Dirty Scooters - Lambretta Li 150 series 2 restore and 64 GL malossi 221

this blog is a record of my scooter projects. The Dirty Rocket is finished for now, and I am about to begin restoring a '58 Lambretta Li150 series 2. The Dirty rocket started out as an attempt to build my ideal scooter from a rusted bare heap for as little money as possible. (The frame is a '57 VNA) now a 64 GL frame. TO FOLLOW THIS CHRONOLOGICALLY, START FROM THE BOTTOM OF THE PAGE... AND Please leave comments/ tips/ warnings!!!

Tuesday, September 26, 2006

DC Comics.... it's a bloody joke


After carefully installing the loom and checking the schematic, I bought a DC horn (see diagram that came with the loom).
Looking at the schematic, I couldn't understand how the horn or tailight could get any current without the engine running. I rang Beedspeed last night and asked what the story was. Alan (who designed the loom) said "..no, that should be an AC horn. It was so long ago, I can't remember how they go, can you email me the diagram". I did and he replied with confirmation that it should read AC Horn. ... BLOODY GREAT!

I have altered the schematic to keep the horn DC and the brake light running off the battery. I feel safer in traffic at night knowing that if I stall I am not completely in the dark.


I also recieved an email from beedspeed stating that the reed block had been 'ordered in.'
24 hours before that I spoke to someone there and he said they were definitely in stock and would post immediately. ... BLOODY GREAT!

for love nor money - definitely not love of money

I've just done the maths, and this scooter has cost me over 4000 australian dollars.
Given that it was a bit at a time and I can't save up, I have decided that at least half of this would have been converted to beer and pizza instead of lining the pockets of parts suppliers across this great globe.
Anyway, I have to accept that like any other peformance based motor vehicle enhancement, the final value of the vehicle never reaches the cost. My motor has cost me half of the total, so it had better go bloody fast when it's done.
My point is (apart from not to make rambling posts after beer and wine) This scooter has been/ is being built for my purposes, not for investment. The next one will be a classic restore. OK.

Now, just lately I have been busy preparing stuff for the big dremel fest. I have always assumed that the cases (worst case) or the clutch cover was warped because I had to hammer the cover until it pops into place. Tonights practice dremmeling along with the frustrating wait for my reed block and crank allowed me to remove some aluminium allowing the clutch cover to slip on nicely. One problem solved.

Tonight I have been on the phone with Germany and England trying to sort out my engine parts.
First I ordered a malossi reed manifold, a balanced long stroke crank and a deepened reprofiled head all from SIP scootershop in Germany.
Next I realised I needed a special Worb5(german) longstroke crank designed to allow better gas flow with a reed valve and emailed SIP immediately asking to change it.
I got no reply for nearly a week, so rang them last night. Firstly I found out that the reed block was out of stock and was over a week away (before postage). I also found out that they were confused by my order and asked me to ring back tomorrow when the person responsible would be in.
Next I rang Beedspeed in England and ordered the reed block right away.
Tonight I rang SIP in Germany and changed the order to what I wanted. Hopefully I am on the dremel by Saturday. Yeehar.

Tuesday, September 19, 2006

switched to a better headspace

Progressed a bit tonight with the headset switches wired up, the cable inners in and sorted (for now) and the starter switch added under the headset.

still to do on body (not thinking about the engine for now)
  • attach brake pedal and wire brake light switch-done
  • get thick red wire and make a connector for relay to starter motor - mostly done
  • find a bolt to use as a pinch bolt for headset - must be allen key and I think imperial 3/8
  • find bolts and nuts to use for levers - done
  • find fuel tap lever and install tank - done
  • bolt seat on - need 30X7mm bolts (X5)
  • find large cable end nipple for front brake lever end - done
  • charge battery, get multimeter back off Fraser and test electrics- all good except regulator doesn't work-get regulator
  • Install under seat kill switch, or tape up wires.
  • find bulbs - headlight, tailight, brake.
  • screw on the rear sebac shock
  • find small hook for joining stand spring to frame
  • get a horn and fit
  • get tank gasket
  • fit legshield glovebox, remove and paint
  • make glovebox fitted crashbar
  • get mirror suitable for going on crashbar

ENGINE TO DO

  • change out flywheel bearing and seal-done
  • dremel out rotary pad
  • dremel out inlet to match malossi reed block
  • insert nipple for vacuum fuel pump
  • install crank.
  • install deepened head and test squish and clearances.
  • change over clutch corks (new ones soaking already).
  • Lap the surfaces of the malossi reed kit. (get lapping compound).

Sunday, September 17, 2006

THE GOOD NEWS OR THE BAD NEWS?

WE'LL START WITH THE BAD
I swapped out the motors yesterday for 2 reasons. One, to make sure the red rocket didn't end up in the back of the workshop in bits. secondly to give me the time to make any adjustments necessary prior to installing into the GL.
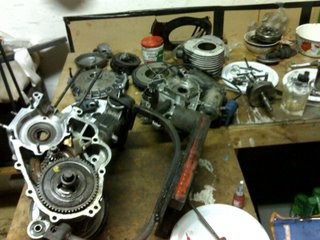
Today I stripped the engine and found...


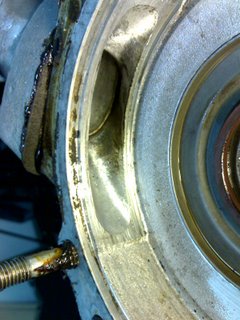
1. the rotary pad is stuffed. The inlet porting was so extreme there is a matter of millimeters left, and that is scored badly.. because..
2. the crank was out of true. remembering the bashing that took place as we tried to get it in and the case halves together, as well as the transport from sydney I am not surprised.
3. I am going to have to go with a reed setup. There are many arguments for and against jb weld repair. I guess once I go reed I can't go back. One advantage should be improved fuel economy. I dream of getting the same economy as the rest of you.
4. The spending spree has a long way to go. I thought it was finished when I got the rims and tyres the other day.
5. the clutch showed no signs of damage after approx 2000km and the corks don't seem burnt much. I have been leaking oil from a few spots so the clutch has been under oiled for about 6-700kms.


ACTION REQUIRED
My mind is made up. I am installing a balanced long stroke crank, a custom head machined to not require a 1.5mm base gasket (the stroke is increased by 3mm stock). As far as I can tell, the use of a deepened head rather than a base gasket keeps the torque lower in the rev range and higher.
I am also installing a malossi reed block kit. I have no intention of racing around, nor trying for speeds of over 115kmh, so I have decided to go for a combination of fuel economy low end torque and, of course, the ability to surprise people with unexpected zip from a fat bastard on a little old vespa.
The rotary pad has been decimated by someone dremmelling out the inlet port (180 degrees I'm told) What remains of it has been scored by something (perhaps a result of the unbalanced crank).

So the shopping list has been made and now I go back to the body...

THE GOOD NEWS

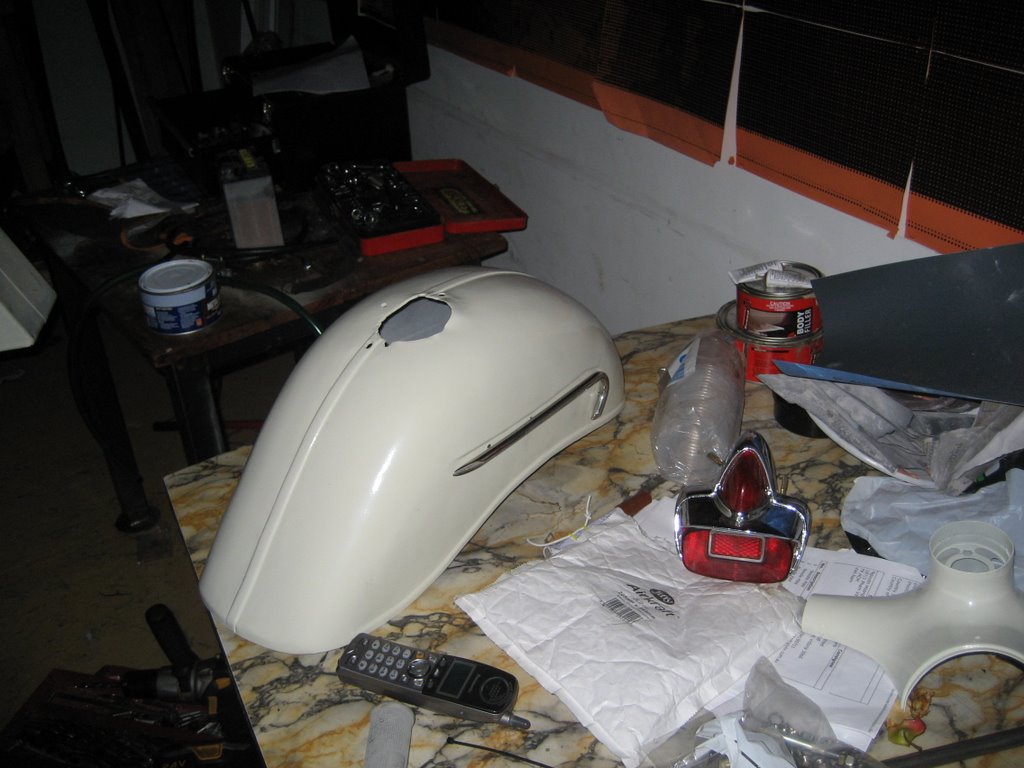
Small details are each taking quite a bit of time. For example, getting the front brake cable to work on a PK drum at one end and a VNA handlebar at the other.
Missing spring for he cowl clip. Also the vna side panel doesn't quite clip on right.
I suppose the good news is that I was rummaging for a fuel tap lever I know I have somewhere when I stumbled across a cowl hook spring, a chrome bag hook (ordered for some reason in the past) a front brake cable that I was able to use, the missing washer for the fork top and some electrical connectors.

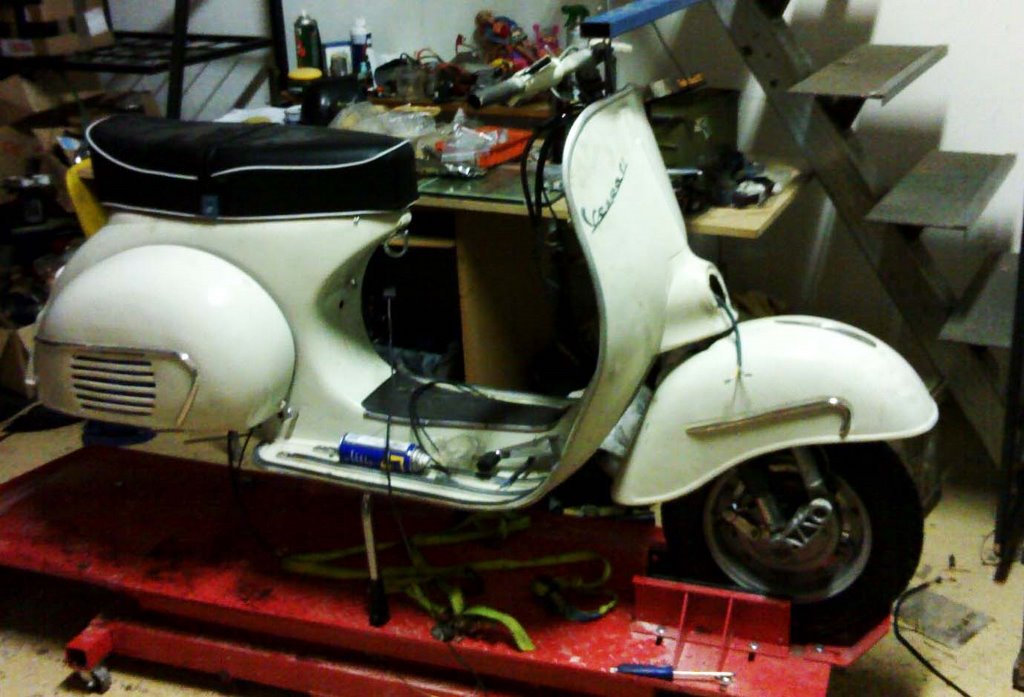
I have attached the fender and fork, now that I have the cables through.


Thursday, September 14, 2006

oily morning puddle's got me sumped

The fact that this morning's oil puddle was bigger and cleaner than usual just after I topped up the gear oil, may indicate that the leak is from a mid level part of the engine, such as..

1) the gear changer (hope so)
2) under the flywheel (there was a bit of oil under there last time I looked, but didn't look like it was coming from the actual seal.
3) clutch cover. (has threads stripped on one of the bolts. I last did it up with some gasket goo 2000 km's ago.
4) rear hub.

I wonder if it is possible to put talc on the motor (or something) to see where the source is. Once the scooter starts up the oil from leaks blows all over the place causing mass hysteria (well, difficulty tracing leak at least).

the screaming Jets

Getting ready to do some more jetting.
I haven't got the CH temperature above 230 while commuting, and it feels like the low end is getting richer. I will check whether the screws are working their way out (air and idle) or whether the air filter is getting clogged with 2t oil from the excessive blowback.
I have pretty much ignored the main jet for the last month as I have only been commuting, but I will ...
1) clean out the filter pod and see how the bike runs tomorrow.
2) count out the turns on the air and idle screws and check they are staying the same after a week.
3) put in a smaller main jet and see if there's a performance increase.
4) put the timing back to 18 BTDC and check with light.
5) change the needle to a leaner taper (3/8 throttle- WOT)

results...
1)
I cleaned out the foam air filter pod with soapy water and lightly oiled it with filter oil. I forgot I did this and when I started the scooter up this morning I thought I had a jammed throttle. It ran like a dream al the way to work (apart from the headlight falling out and hanging like a horror movie eyeball). I guess that cancels 2,4 and 5. I still need to sort out the main jet.

regulatory body

Here's where I put the regulator. I welded a strip of 25X3 flat steel to the battery tray and welded some bolts onto it for the reg to go onto. It may be a squeeze to ge the reg onto the bolts but we will see. If necessary I can slot the reg case on the left hole. I also welded a bit of flat bar sticking up to the left of where the reg goes for the attachment of the starter relay and any other bits and bobs.

Monday, September 11, 2006

I'm gonna walk down to .. 'ave a new electric


The puns are getting worse. Bad gags Loom-in.
So far I have the loom in place, have routed the cables through to the battery side, routed the tail-light cables and installed the tail-light (vietnamese GS copy). I think the tailight may have been a changeover one for a px because it sits flat and leaves a little gap at the top. I ground it which improved it a bit.
Electrics worries are as follows...
1) does my lighting/charging regulator work (got it in a box with some other stuff)?
2) Where to put the starter relay. The loom came with a cable that won't reach across the scooter from the battery side to the starter.
3) There is a cable missing from the loom - battery to regulator - no biggy.
4) Front headlight - the VNA headset is small and the replacement glass is plastic. I'd like to get a halogen in there, but am worried that even a normal 12V globe will melt the plastic.
5) Where to put a switch near the seat?
6) Do I put in a key ignition somewhere?

free range night - battery chicken no more

I was a bit chicken to deal with the battery, so tonight was a breakthrough. My battery tray arrived the other day from Lambretta Parts in America . I didn't check with anyone as to the best position for it in the glove box cowl, so I just took a punt.

...also I have managed to get the loom in, painted the cowls, front fender and headset with the colour matched paint and sent my new chrome rime (scootrs) to the scootermarket for some sava mc18 tyres.

..I have also attached some blingy bits also from scootrs. The cowl trim was fairly good, but the screws that came with the fender trim were made of cheese which didn't go together well with the badly tapped holes. Now I need to buy an easy-out and some decent m5 bolts. There's simply too much to do without having to mess around fixing dodgy bling. The shiny bits do help to detract from the lumpy bog-work.

Tanks for the Memories


got hold of a GS tank today. It holds 9 litres rather than the stock 7.5, meaning my range will be back up to 120 km rather than the 103 I am currently getting.
If I get around to installing a reed manifold maybe one day I will have a decent range.

FREE hit counter and Internet traffic statistics from freestats.com