Dirty Scooters - Lambretta Li 150 series 2 restore and 64 GL malossi 221

this blog is a record of my scooter projects. The Dirty Rocket is finished for now, and I am about to begin restoring a '58 Lambretta Li150 series 2. The Dirty rocket started out as an attempt to build my ideal scooter from a rusted bare heap for as little money as possible. (The frame is a '57 VNA) now a 64 GL frame. TO FOLLOW THIS CHRONOLOGICALLY, START FROM THE BOTTOM OF THE PAGE... AND Please leave comments/ tips/ warnings!!!

Monday, August 24, 2009

wedgie - A Brief Update

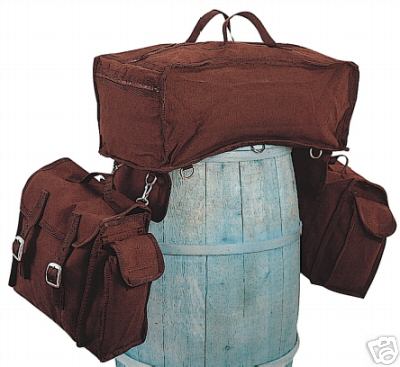
 Pictured is my Li150 that I sold recently. No that is not me, That is MAnni from the Stone Roses and Primal Scream. They toured Melbourne recently and we had him around at my workshop and a few cool bars.


Wow, since we last spoke plenty has happened.
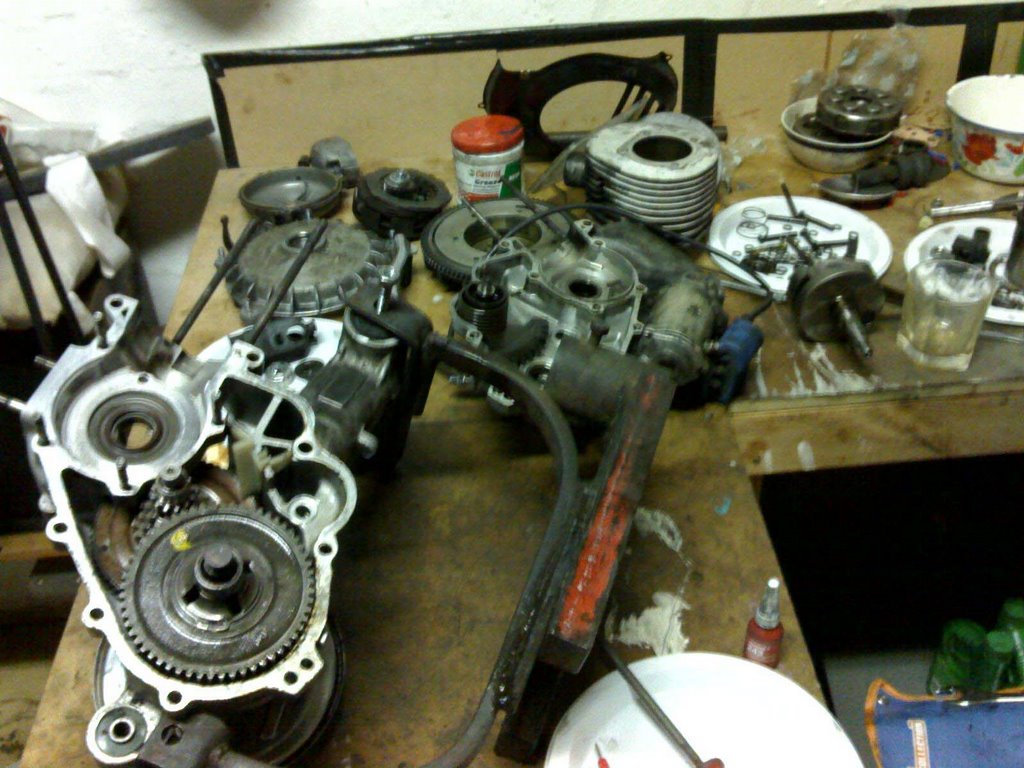
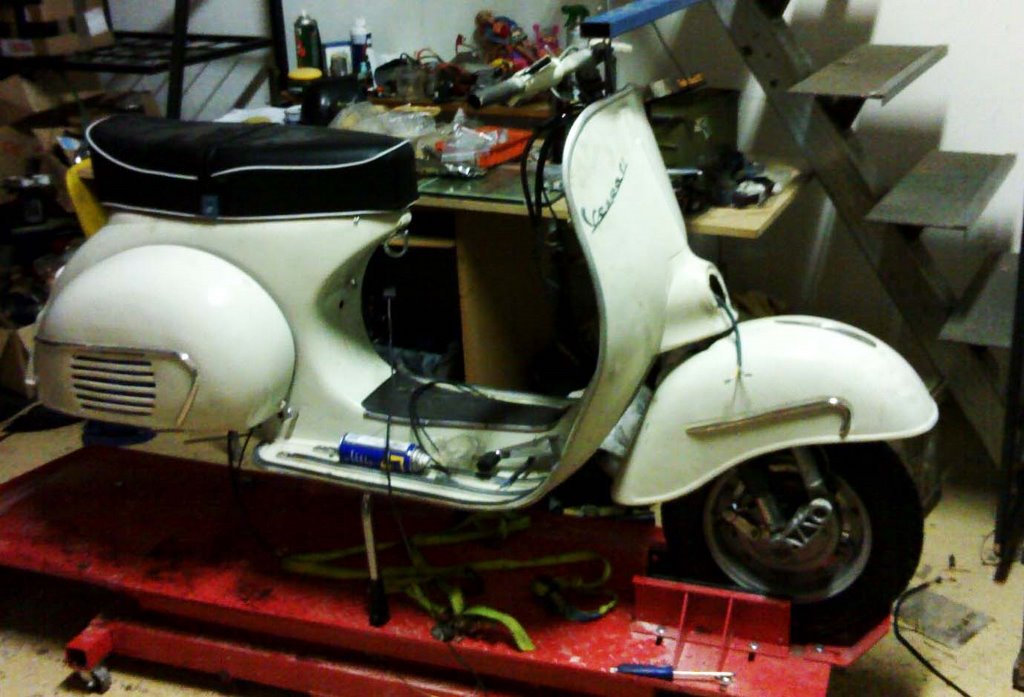
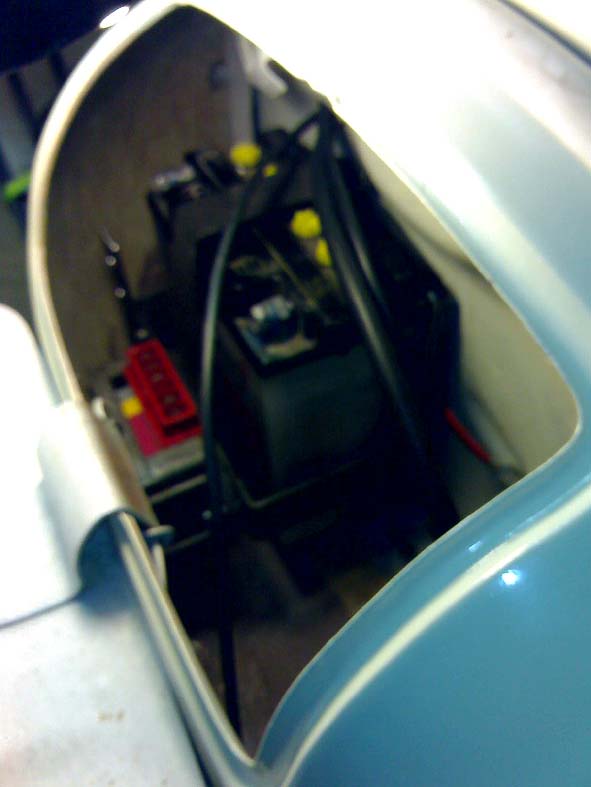
- The tv175 was put on the road and ridden daily for at least a year. Maintaining the barn fresh look, I got the internals running beautifully so I just looks like it will break down any second. Let the registrartion lapse due to getting a lovely Li150 series 2 and using that as my daily. That's another story.
- the Li150 basket case was sold for what I paid for it. Didn't seem worth having as I had a complete and running version by then.
- The Dirty Rocket was ridden around Tasmania, as well as a trip to the national in South Australia. Beautiful bike. I put it off the road when I registered the TV175 and after a year I decided to sell. It went to South Australia.
- The 'Limahl' LML t5 200 sat in my office for a few years until a mate and fellow scooterist showed an interest. Beauty is in the eye of the beholder I say. He is still using it and it looks rather tidy compared to when I had it.
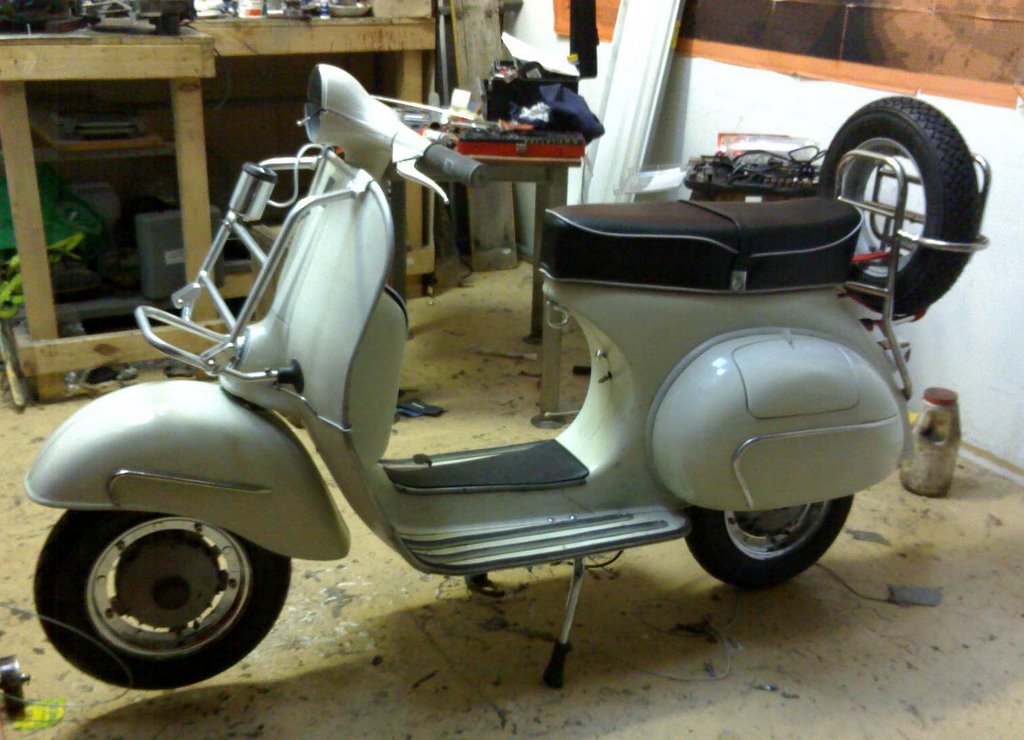
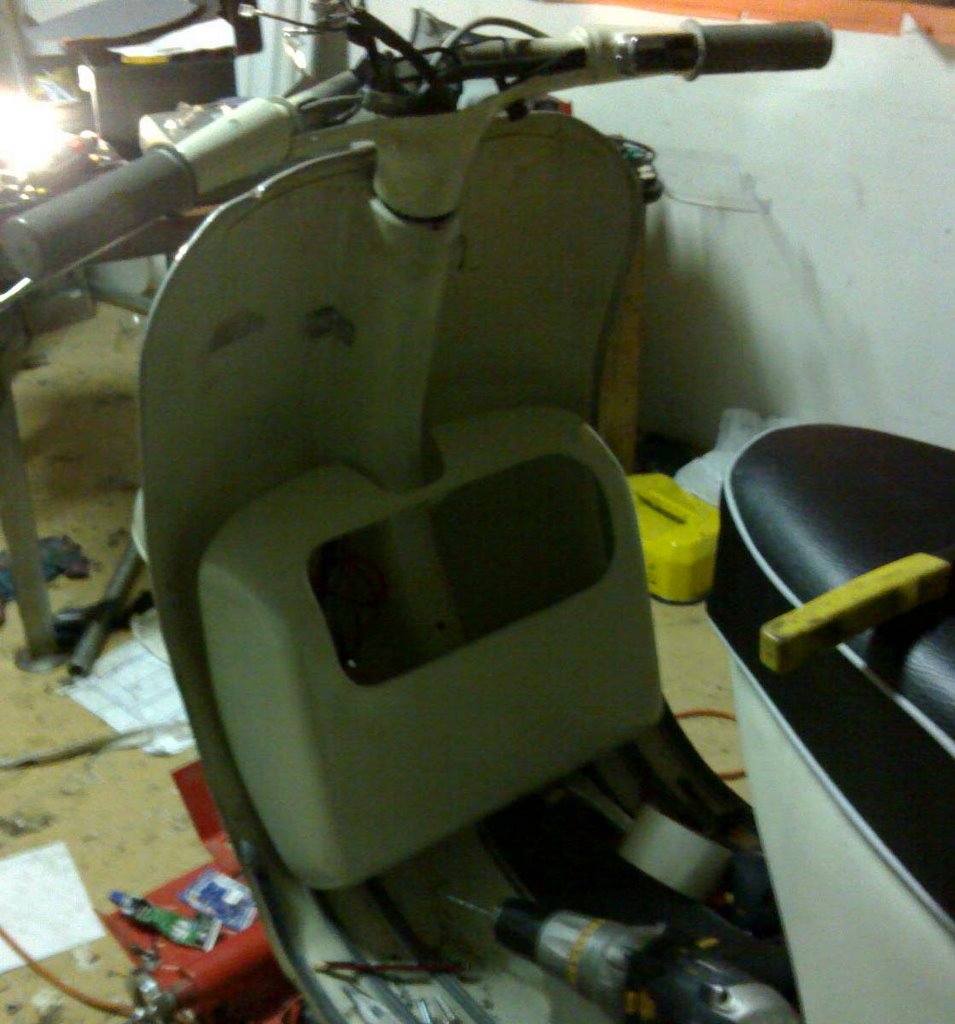
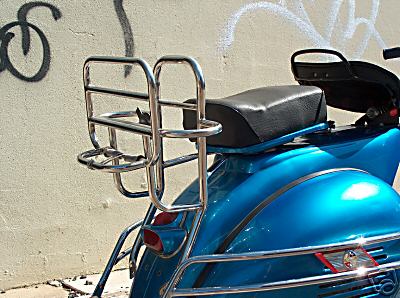
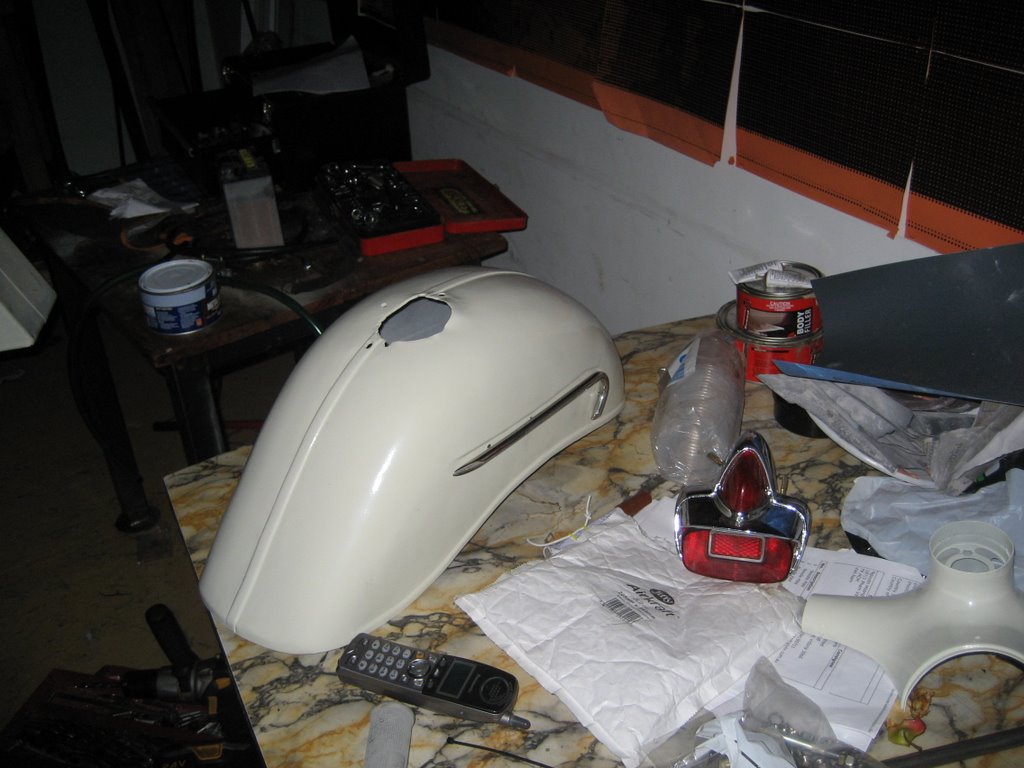
- My Li150 series 2 that I bought since my last confession was a little ripper. I installed a casa 185 kit in it as well as a big bore exhaust, a varitronic ignition, etc etc. Recently I have put it back to stock barrel and sold it to a young fella who is thrilled to have the opportunity to own a genuine Lambretta.
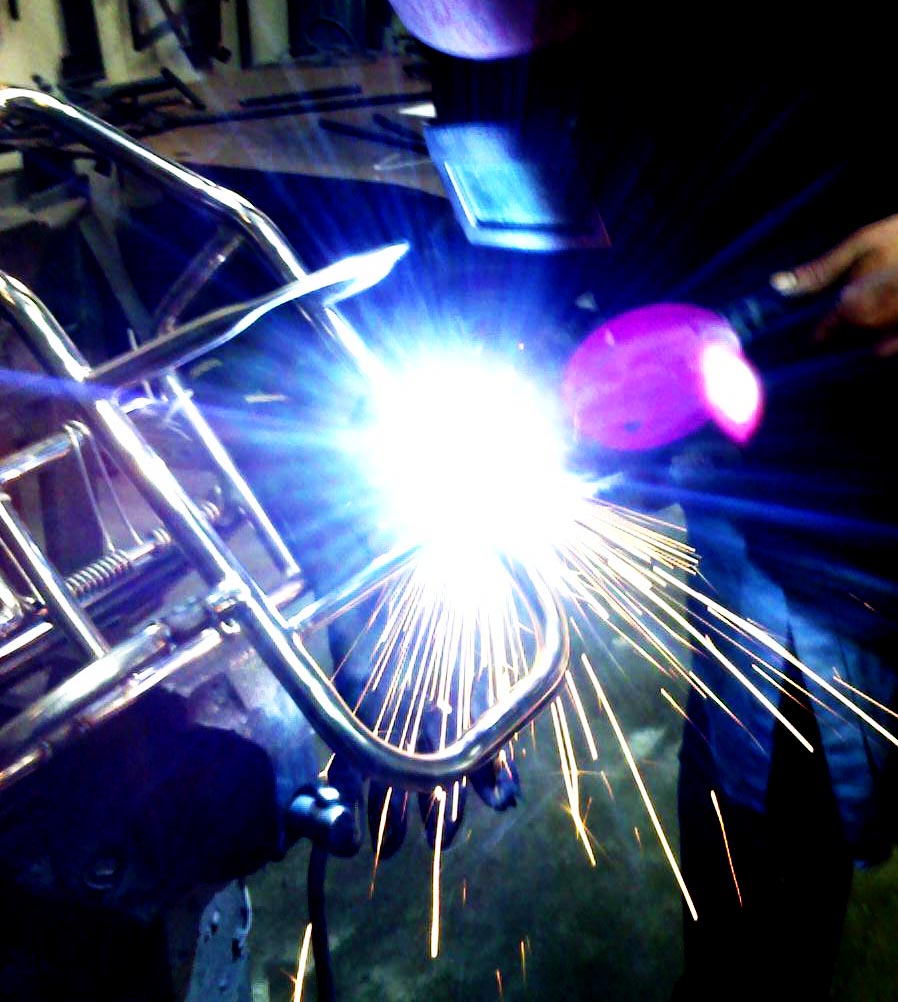
- In the midst of all this I have set up as a professional classic scooter mechanic AND have bought a 1971 triumph Bonneville. Quite a handful to say the least . CLICK HERE for the blog

Tuesday, September 18, 2007

TV John - Lambretta naming right save the day


Meet the whole family... in a place called 'scooterlabs.net'
From the left.... on a stand is The Li150 (Juan fitty), then TV John (TV175), up above the VNA frame that inspired the Dirty rocket project, then Limahl (LML T5 - red and black), then the Dirty Rocket behind the table.

My wife has demanded naming rights for the TV and decided (instantly) on "TV John" after our favourite character from the Hamish Macbeth series. A small price to pay for being busted with two Lambrettas in the workshop.
Anyway, here's a snippet from an email I wrote to a mate summing up recent news ont eh TV175 progress.


TV News..........
Rebuilt the bottom end. Firstly I discovered my cases were cracked in the cylinder stud causing a dodgy transfer port. Managed to get them welded and te-tapped by THE MAN recommended by Brenton. He was good, and loved doing it (Ferrari and scooter guy).
In doing so found the crank had been messed with so had to replace it.
There are not too many places in Australia you can drive 3 minutes to pick up a new tv175 crank on a Saturday.
Had a few issues with the head gasket (had to lap it).
Due to me thinking the piston was upside down (it wasn't) then reassembling, then discovering it was the head loose, I can now get my barrel off and on again... Back on the road in 65 minutes. Not bad for a beginner.
Once running nicely I took it for a roadworthy, explaining to the dudes about the special category in the Sydney Lambretta Show that I had prepared it for. I told them as the president of the *&^&&*(*($@^ (mumble) I was responsible for providing a completely safe scooter that LOOKED like it was fresh from a barn but had all new and safe innards. This seemed to work.
Next was the Vicroads inspection. No probs there. The only danger is beaurocratic bungles, such as missing receipt, discrepancies in year and vin numbers, etc.


Next episode... i put it on the lift to sort out a cable routing issue. The throttle cable seemed to pull away from the carb when on the stand causing a high idle. When on the lift I noticed a considerable amount of play in the rear wheel. After a few phone calls I was still undecided whether to push ahead and leave the gearbox for after Sydney. A bit of internet research made me wonder whether the end plate nuts were loose. Keeping in mind I didn't even know what and endplate was, I was interested to find a bunch of loose nuts on something I would refer to as an end plate if I was doing the naming. Pulled the studs out, cleaned them up and smothered in loctite. Everything else seemed intact so I went back to the idea of doing the shimming and dog replacement after Sydney. Now it is nice and tight and handles well. Brakes ok, accelerates OK, starts OK. I thought the headlight was broken, but is is just a terrible 6v headlight . No wonder the Mods of the night put a few extra lights on.

Current worries

1) old wiring craps out before I restore

2) worried the endplate studs may loosen again

3) paying the price for not changing the kickstart seal as now it has done 20km's has started to leak.

4) died suddenly on the road last night. After full spark/fuel diagnosis it started again and ran fine. Worried about gettign used to the nature of the Lammy.

Monday, September 03, 2007

Too much TV to blog - my new lambretta


I suppose you are wondering how the series 2 lambretta is going???? well nowhere really. I have sourced a headset top and a flywheel.
I HAVE, however, started a national scooter magazine, bought a barn find TV 175, set up a shared access workshop space for classic scooters and got the TV to a state of roadworthiness.
Each of these things deserves at least an entry each, and I will endeavor to gather posts from various forums describing my progress with each project.


Currently the TV is in bits as I attempt to rebuild the bottom end prior to the sydney 2007 Lambretta 60th birthday celebrations. About ten of the Melbourne Crusaders SC are trucking up so as to have the most time showing the Sydneysiders how to party.

when I pulled the barrel off there was an unfortunate chunk missing from the cases. One of the studs has been over torqued many years ago (the bike hasn't been registered sine 1982) and the side of the thread is exposed right inside a transfer port.

I have sent the case to a known genius in the field of case welding, and hopefully will be rebuilding this weekend.

Monday, February 05, 2007

the keys in the drawer - what's the metalfor?

You know the mixed emotion you get when you have searched for the keys for 2 hours only to find them in your pocket? Extreme relief at having found them, with a fair bit of grief for the lost time as well as a hint of shame at the stupidity.
Read on friends, and find out how I fixed my vibration issues.


I think I can beat Paul's "total rebuild to fix a cracked exhaust" story.
After changing the crank, bearings, exhaust mounts 3 times, new
flywheel and engine mounts I am pretty sure the engine cowling is
rubbing on the engine side panel.
Just after fiddling with the exhaust mounts one more time, I noticed
the wear marks and rode up and down with the panel off... all was well.
So why did the vibes go away when the exhaust stub was loose you ask?
I'll tell ya.
Because the throttle cable I used to stop the header falling off was
pressing the cooling shroud in and away from the panel.

I'll never be completely sure 'cos I bashed the shit outa the panel to
clear the shroud before testing. Perhaps the bit of inner tube behind
the case to exhaust mount did the trick.

Hmm. Glad it is over anyhow.

Anyway, I now have a perfectly good spare race crank and flywheel to sell.

While we're at it, the SIP performance expansion chamber is back on (see jetting page in links)
A quick blat on the freeway saw an easy cruise at 110 (genuine) with plenty to go. I backed off when the temp soared to 400. I'll change the main jet and see.

Saturday, December 30, 2006

derek's s2 Li150 shopping list

if you are perveyor of Lambretta parts and you want to send the kids through uni', keep an eye on this ever evolving wish list.

Pre shakedown..... (note I am yet to see what mileage it did prior to being garaged)

  • seat covers
  • stainless nut and bolt kit
  • side panels
  • headset top
  • grips
  • floor rail kit
  • cables - all
  • wiring loom -
  • taillight lens
  • tyres and tubes
  • engine rebuild kit - bearings
  • all seals
  • clutch rebuild kit
maybe...
  • electronic ignition kit
  • top end/ or just oversized piston

Friday, December 29, 2006

- THE DIRTY LIE -


While the bench is still warm from the 'dirty rocket project' I have gone and started another one.
After procuring and attaching EVERY single part of the malossi 221 px engined '63 GL, I have decided to have a crack at an original restore. This time it's a LAMBRETTA.
Yep, I've crossed the floor.
This time the scooter is nearly complete, so each time I need a new part I will at least have the old/worn/broken one to refer to.

More later when I come to grips with what I have done.

The bike will be called the 'Dirty Lie'. Built by dirty derek.... Li model, and the whole process of aquiring parts will involve many a little white lie to my wife. I already said I got it for nothing.

Tuesday, December 19, 2006

Two horses with one stone

I got a bee in my bonnet and pulled off my sito (2500kms),reshaped the
stub hole and replaced the clamp from an old stock one.
I formed some flashing, smeared it with Dirko (red goo) and banged it on.
It really feels like I am getting more horses in the mid range and the
vibrations are all but gone. (well, relatively anyway).

The malossi stub was in a terrible state, but considering it has been
rubbed approximately....20,571,428 times I think I'm lucky to seal it
at all.

Alltogether a great result. (I never considered the loose stub to be the cause of some of my vibrations).

If you look at the picture I have drawn a green line to indicate where i think the power curve might be now. It's only guess work. It doesn't look much diffrent but averages a horsepower more acrodd th lower and midrange. I haven't tested full throttle yet so I won't get carried away with my green virtual texta.

If I was chasing numbers I would put on the JL pipe I have in the workshop and the curve would resemble the matterhorn. It just seems like a lot of trouble to impress YOU. I had it on the Malossi 210 and it

Monday, December 18, 2006

Taking a peek at the Map - of- Tassie

I'm taking the dirty rocket to Tasmania with the Wife as a pillion as well as all the camping gear.
This trip has symbolically represented the 'goal' of the GL project. A classic scooter with enough grunt to take us both around Tasmania.
I must admit my wife was surprised when i said I had booked the ferry. Even though I have gone on about doing it for a few years, I think she was hoping the dream would fizzle out.
I found this....
Either it will sling across the back of the seat giving my wife lumbar support while the bags hang on the back of the cowls, or I will make a support to put it on the back rack. We'll see when it arrives.

Two fine horses

Quick updates starting today and working back..
Went for a quick blat on the dyno and pulled 2hp more than last time. (pre-28mm carb/reed/ long stroke crank)
I have made a chart showing where the speeds are in different gears.
It shows that, if I get to 8000rpm in 3rd(104 kmh) then shift gears, I will drop to 2000 rpm and 1.75 horsepower. The yellow highlighter shows the climb from hte change to full revs in most gears, showing the need to lose the little dip after 90kmh (4th).

Also..... I had a couple of issues changing gear inermittently. I rebuilt the clutch (cosa) and found a warped top steel plate, damaged tabs on the cork plates and slightly burnt corks. I have yet to settle on what caused this, but it is either failure due to petrol in the oil, naughty riding, or plates put in the wrong order. I used logic to put the plates in last time, and this could have been a bad idea. This time I have gone by the parts picture.
1. slightly thicker plate (small notch on one tab)
2. thick plate with shorter cog tabs.
3. thin
4 thin


Also.. I took the scooter to a music festival (Meredith- drones, dallas crane, Tapes and Tapes, Rose Tattoo, Soundtrack of our lives, New Pornographers, Augie March, etc etc.).
The trip home was in 42 degree heat (109) and there was nothing out of order. Well, the carb did fall off a few times but that was a learning curve on how tight to do up hose clamps in hot weather. The soft rubber simply spat the carb out when done up tight.

A nice cruising speed of 95 was achieved .

Also... the bike ran well three weeks ago at the Mt Beauty 'Mountain Goat rally' . 1000km on a pre-dialled in carb and I was well and truly ready to get it right. Over the windy mountains was great while the top speed was poor on the way home on the wind.

Thursday, November 30, 2006

so many stories to tell

The picture is me in the victorian alps on the 'Mountain goat scooter Run' - 2006
It was taken from the back of Ifan's '64 Lambretta 150.


so I don't forget...
flywheel vibrations (not crank)
shot Hall Effect Sensor (twice)
New flywheel
1000km weekend (without a breakdown)
... at 3/4 throttle - now repaired.
Second hand genuine PWK carb - dodgy fuel valve seat
currently dialing in ..
weekend- GJK needle-136 main run a bit hot at 1/2 - 3/4 throttle. cooler when the throttle control opened up more (vna handlebar only gives so much throttle movement pre-dremel)

LJK needle - tremendous mid reange throttle. Full a bit gutless (and hot)
132 main

LJKneedle, 140 main dropped needle one clip from centre - still great response at half to 3/4. Main seems ok, but no highway test as yet. 1/4 throttle very boggy.

same as above but richened the clip position to one notch below centre - about to test.

It seems i still can't tell the difference between rich and lean by feel.. one day maybe

Sunday, October 29, 2006

you can't handle the truth

The handling issues became more and more apparent. I added the 'engine mount stabilisers' from 'hot rod scooters' that I had lying around. I thought the engine mount area was the problem. This didn't help, so I put in new rubber engine mounts, removing the uprated urethane ones. This didn't help either but it did reduce vibrations by a lot. This is a rlief and was something I intended sooner or later anyway.
I went to see Klaus (scooter expert and collector) and he went around the block, instantly blaming the steering bearings for the wierd handling..... so below is the final post on th ebbs forum explaining how I dealt with it.


Another problem solved... and here's what happened (for future searches).
I bought all new post 63 bearings and races.(apparently they are all the same from then on ... but I find it hard to believe).

I pulled out the fork and had a look at the upper and lower bearing races. Both seemed to be deeper than the new ones. Seeing as I was committed to the PK lower lower cone, I decided to try and remove the lower frame race from the GL frame. Fortunately it was a later style without the sleeve going up the tube.
I made a tool (handy owning a metal shop , albeit wrought iron) to extract the race and it worked fine. Before I could measure the old race to see if the new one would go in, I dropped it into the frame channel (forever).
Two hours of fiddling, sanding, making tools and hammering saw the new bottom frame race go in. Everything else was a doddle.
Before reassembling I had to clean up and rush out to a wedding (congrat's Dave and Kerrie), so I didn't have that magic feeling of a well handling old vespa until this morning.
Cruising at 60 kmh, I took my hands off the bars no probs, then applied the rear brake. It tracked straight and true. Now the project is complete, and thanks to this bearing issue, I changed back to rubber engine mounts, killing the vibrations and proving the old mazz crank to be useable in the future (I blamed it for the vibrations and ordered a new balanced LS crank).

Thursday, October 26, 2006

testing 1-....ooh

Probably done a hundred k's so far, and last night thought i'd let the revs do their thing.
Then it died. Here's the BBS transcripts...
Finally had the courage to test the new motor at high revs (in 3rd) and it stopped dead.
Not a seize
Not the fuel
compresion is fine
Spark has no bits on it, looks in good shape and is chocolatty brown.
No spark
Isolated engine (pulled green wire)

question.... After I find out it is not the spark, cap or lead, what is the most likely electronic thing to shit itself at high revs? CDI or stator?

cheers
derek

derek
63 GL 220
port matched malossi kitted px200 lump

I'd check in order-
Compression (just feeling it by kicking it over)
Spark
Fuel
Timing (sheared key?)


Thanks E. so far.....
compression- OK
fuel - OK
spark - no
spark with two other cdi's - no
spark from end of lead - NO
does a sheared woodruff prevent spark? Logically it would create a spark, but just at the wrong time to start the bike.

I am stranded at home 15 km from my workshop. i have a junior member of staff bringing half my tools in the truck.
What I want ... to remove the flywheel and solder a loose wire back onto the stator.

derek
63 GL 220
port matched malossi kitted px200 lump


>junior member of staff bringing half my tools in the truck.
>What I want ... to remove the flywheel and solder a loose
>wire back onto the stator.

yep. happened to me just like that. 140 miles from home.


white wire has been rubbing on flywheel near the stator. The insulation has worn off but the wire is intact.
Is if the white wire is rubbing on the inside of the flywheel, will this kill my spark?

jUnior forgot the multimeter, so I'll stitch it back together with some tape and see what happens.

derek
derek
63 GL 220
port matched malossi kitted px200 lump

... now I have found the desired resistance from the stator...

Here are the #'s to test the sparking coil and pick-up.

resistance between white and green 500 +/- 20 - ME-spot on
"" white and red 110 +/- 5 - ME - 37,000 ohms

I have ordered a new stator from GPS imports in Abbotsford, and booked an express courier to bring them to me in my home. I am determined to get to work ON MY DIRTY ROCKET at some stage today.

'

Thursday, October 19, 2006

gordon's alive


It works. today the inaugural ride to the servo for fuel went without too much trouble. (naturally it revealed a leak in the fuel tank lid ).
Gear changes are a bit iffy and the clutch, while engaging quite far out on the lever action, still grabs.
things to do...
-fix fuel tank lid
-attach bike speedo
-attach cht guage
-sort out mirror
-get chrome toggle for spotties (by the way the spotlight kit was great and came with all the wires, junctions and even chrome coil cable covers). The switch they came with is plastic and doesn't suit my look.

note - did 10km today an dall seems good. The motor is very responsive. Handling is a bit strange, but I assume that it is a matter of getting used to a new bike. The front brake is no good at all so I must decide whather to get a new PK drum, or go ahead and install a disc kit.

Tuesday, October 17, 2006

one drop of essence of terror, two drops of sinister sauce....

well it runs.
Problems...

Gear change cables don't work too good
Throttle control doesn't open it out all the way
No bolt for old sito plus
clutch cable jumps out of position (therefore front brake may do the same)
no holding clip on gear change shaft
carb floods (probably due the upward angle of the malossi reed block intake manifold).

Solutions....

Gear change cables don't work too good- fiddle around and make sure it is not just incorrect tension
Throttle control doesn't open it out all the way - I can dremel off part of the stopper in the headset
No bolt for old sito plus- buy one
clutch cable jumps out of position (therefore front brake may do the same) - dunno, fiddle a bit and see what's what
no holding clip on gear change shaft - tgry to make something or buy something - research availability of spring steel
carb floods (probably due the upward angle of the malossi reed block intake manifold).- change the float position and hope it doesnt cause fual starvation.


.... mor eto come I'm sure.....

Monday, October 16, 2006

feeling cranky


well today the crank and head arrived, but the wait saw loads of gardening get done.
They were packed badly with the crank exposed to any impact during transit. we will only really know if it has been knocked out of true when I start it.
I installed the crank, eventually got the flyside inner race on and closed up the cases.
The crank spins ok, and I put the cylinder on. As it is a long stroke crank and I am using the deepened head rather than a thick base gasket, I must be careful to align the head so the piston doesn't hit the head on the way to top dead centre.
Oh, and also I had to dremel off soem of the malossi reed block to get the cases to close up.
Tomorrow night the engine goes in the bike... yikes!

Thursday, October 12, 2006

ah, ups

Location Date Local Time Description
ASCOT VALE, VIC,
AU
16/10/2006 2:15 IN-TRANSIT SCAN
ASCOT VALE, VIC,
AU
14/10/2006 10:53 IMPORT SCAN
ASCOT VALE, VIC,
AU
13/10/2006 22:11 PACKAGE DATA PROCESSED BY BROKERAGE. WAITING FOR CLEARANCE;RELEASED BY CLEARING AGENCY. NOW IN-TRANSIT FOR DELIVERY

13/10/2006 21:21 PACKAGE DATA PROCESSED BY BROKERAGE. WAITING FOR CLEARANCE

13/10/2006 21:21 REGISTERED WITH CLEARING AGENCY;SHIPMENT SUBMITTED TO CLEARING AGENCY

13/10/2006 21:21 REGISTERED WITH CLEARING AGENCY;RELEASED BY CLR AGENCY. NOW IN-TRANSIT
CHANGI,
SG
13/10/2006 6:45 ARRIVAL SCAN
KOELN (COLOGNE),
DE
10/10/2006 23:30 ORIGIN SCAN

10/10/2006 23:29 EXPORT SCAN

10/10/2006 23:17 EXPORT SCAN

10/10/2006 21:06 ARRIVAL SCAN

10/10/2006 16:49 ARRIVAL SCAN
HERNE-BOERNIG,
DE
10/10/2006 15:39 DEPARTURE SCAN

10/10/2006 14:49 DEPARTURE SCAN

10/10/2006 11:23 ARRIVAL SCAN
FRANKFURT,
DE
10/10/2006 7:30 DEPARTURE SCAN

10/10/2006 6:15 ARRIVAL SCAN
DITZINGEN,
DE
10/10/2006 3:08 DEPARTURE SCAN
WENDLINGEN,
DE
09/10/2006 23:11 DEPARTURE SCAN

09/10/2006 20:44 ARRIVAL SCAN
GERSTHOFEN,
DE
09/10/2006 19:25 ORIGIN SCAN
DE 09/10/2006 11:24 BILLING INFORMATION RECEIVED

Tracking results provided by UPS: 15/10/2006 5:31 Eastern Time (EST)/New York Time (USA)

Tuesday, October 10, 2006

seeing red .... tape

Today saw the start of the registration process. It won't be easy as the frame sat in the desert for years and the Vin doesn't show up on the rego computers. I have written a letter to Canberra and I'll keep you posted.

zzzzzzzz


...so after waiting a week for my cank, reed block and head I rang SIP and re-ordered (as they seemed to be waiting for the reed), cancelling the reed block and was told it would be posted that day. Next day I get an email (the usual one saying that postage will be much more than anticipated) and I reply saying "yes ok please go ahead with the order... I am in a hurry".
To back this up I rang that night (morning in Germany) and was told yes, it has been sent.
A week later I rang again and was assure the items were posted 8 days before.
A week later I rang and was told 'do you want to go ahead with the order?'
I am so frustrated as this is the finish line.

Wednesday, October 04, 2006

New wack a wheel squeeze


Unfortunately my history of disappointment didn't let me down today when the postie arrived.
The rack (bought off ebay pictured on a 10 inch bike) turned out to be for an 8 inch spare wheel.
The rack fitted the scooter alright, and was just the delicate looking one I wanted..... so........
......


Sorted. Sometimes it's handy having a steelworking factory.
I could have put it back on ebay then started again but I'm not that kind of guy.


Also, by coincidence the scooter owned by the rack seller (ebay) had these strange mirrors(below). I had heard of the clamp things to go onto the VNA split headset, but when this pic arrived I decided to get them. I ordered them from scooterworks in the USA.
Now it is a matter of waiting for the crank and head.


I can't stand it anymore

It's the 11th hour of this project and I'm waiting for engine parts. Tonight I couldn't wait anymore and made a 'placebo' engine so I could get the bloody thing off the stand and see what it feels like to sit on.
I welded some tube together in the appropriate places, attached an old front hub... and bingo ...off the stand.
... so I sat on it...

... bring on the new crank Mr Postman

Tuesday, October 03, 2006

reedy to roll


ok the reeds are in, the glove box is in and I am now deciding whether it is naff to put the vapor enduro computer on the headset or down near the glovebox. I have a standard 2 inch round temp guage with a chrome holder, but (as the speedo will not be connected) I will also have to install a bicycle computer. I would then have to wire up lights in order to see the guages at night. If I decide for the vapor ( http://www.trailtech.net/vapor.htm ) on the headset I will do it right away and start with that. If I decide on a vapor for behind the legshield I will make do with the round gauge then buy a vapor later. Here's a computer mockup of what it may look like... (note the new glovebox)


Arguments for and against the headset mounting....

for - I built this scooter for a purpose, and on the headset i can easily see speed, temp, rpm, distence etc. (internal light)

against - It will look blatantly unoriginal

for - It is the VNA split headset, so I can get another in the future and get it back to oldy worldy.

for - I am getting to like the idea of having something unique. The scooter is made up of so many different parts anyway.

against - It could look ugly, but I don't think I'll really know until I do it. I will get one sooner or later so there's no harm in sitting it there to see how it looks.

Monday, October 02, 2006

reed and weep


Today was one of those Santa days. First my glove box arrived, then my reed block. At 5pm (start of workday German time) I rang SIP and apparently the head and crank have been in transit for 5 days and are due this week.
I had to grind the glove box a fair bit to make it fit, but all was well in the end and I have painted it already.


I got straight into dremeling the cases as soon as I had the glove box painted. my first go on the dremel and I think I did alright. There could be another couple of hours of perfecting the inlet porting but I want to see how it goes with mild work done. The inlet has already been heavily dremeled, so it was already pretty smooth. I removed the rotary pad an opened the inlet to match the malossi reed block. The crank I ordered has some kind of 'special lip' (worb5) so probably reduces the need to heavily dremel out the case.


Sunday, October 01, 2006

Great Racks drive me spare - they wheely do

I just won an ebay auction for a rear 2-in-1 chrome rack. Buying one was on the agenda, so I've no doubt saved a few bob. Hopefully it will fit.

Also the glove box arrived today (scootrs) . It looks pretty crappy and will have to be cut and ground to fit properly. It was cheap and was bought so I didn't feel bad cutting holes for guages in a collectable GS one.

Still no word from SIP or Beedspeed on the engine parts. They seem to know when you are extremely desperate, and refuse to answer any emails for a week. I will ring them all tonight and see what's what.

Tuesday, September 26, 2006

DC Comics.... it's a bloody joke


After carefully installing the loom and checking the schematic, I bought a DC horn (see diagram that came with the loom).
Looking at the schematic, I couldn't understand how the horn or tailight could get any current without the engine running. I rang Beedspeed last night and asked what the story was. Alan (who designed the loom) said "..no, that should be an AC horn. It was so long ago, I can't remember how they go, can you email me the diagram". I did and he replied with confirmation that it should read AC Horn. ... BLOODY GREAT!

I have altered the schematic to keep the horn DC and the brake light running off the battery. I feel safer in traffic at night knowing that if I stall I am not completely in the dark.


I also recieved an email from beedspeed stating that the reed block had been 'ordered in.'
24 hours before that I spoke to someone there and he said they were definitely in stock and would post immediately. ... BLOODY GREAT!

for love nor money - definitely not love of money

I've just done the maths, and this scooter has cost me over 4000 australian dollars.
Given that it was a bit at a time and I can't save up, I have decided that at least half of this would have been converted to beer and pizza instead of lining the pockets of parts suppliers across this great globe.
Anyway, I have to accept that like any other peformance based motor vehicle enhancement, the final value of the vehicle never reaches the cost. My motor has cost me half of the total, so it had better go bloody fast when it's done.
My point is (apart from not to make rambling posts after beer and wine) This scooter has been/ is being built for my purposes, not for investment. The next one will be a classic restore. OK.

Now, just lately I have been busy preparing stuff for the big dremel fest. I have always assumed that the cases (worst case) or the clutch cover was warped because I had to hammer the cover until it pops into place. Tonights practice dremmeling along with the frustrating wait for my reed block and crank allowed me to remove some aluminium allowing the clutch cover to slip on nicely. One problem solved.

Tonight I have been on the phone with Germany and England trying to sort out my engine parts.
First I ordered a malossi reed manifold, a balanced long stroke crank and a deepened reprofiled head all from SIP scootershop in Germany.
Next I realised I needed a special Worb5(german) longstroke crank designed to allow better gas flow with a reed valve and emailed SIP immediately asking to change it.
I got no reply for nearly a week, so rang them last night. Firstly I found out that the reed block was out of stock and was over a week away (before postage). I also found out that they were confused by my order and asked me to ring back tomorrow when the person responsible would be in.
Next I rang Beedspeed in England and ordered the reed block right away.
Tonight I rang SIP in Germany and changed the order to what I wanted. Hopefully I am on the dremel by Saturday. Yeehar.

Tuesday, September 19, 2006

switched to a better headspace

Progressed a bit tonight with the headset switches wired up, the cable inners in and sorted (for now) and the starter switch added under the headset.

still to do on body (not thinking about the engine for now)
  • attach brake pedal and wire brake light switch-done
  • get thick red wire and make a connector for relay to starter motor - mostly done
  • find a bolt to use as a pinch bolt for headset - must be allen key and I think imperial 3/8
  • find bolts and nuts to use for levers - done
  • find fuel tap lever and install tank - done
  • bolt seat on - need 30X7mm bolts (X5)
  • find large cable end nipple for front brake lever end - done
  • charge battery, get multimeter back off Fraser and test electrics- all good except regulator doesn't work-get regulator
  • Install under seat kill switch, or tape up wires.
  • find bulbs - headlight, tailight, brake.
  • screw on the rear sebac shock
  • find small hook for joining stand spring to frame
  • get a horn and fit
  • get tank gasket
  • fit legshield glovebox, remove and paint
  • make glovebox fitted crashbar
  • get mirror suitable for going on crashbar

ENGINE TO DO

  • change out flywheel bearing and seal-done
  • dremel out rotary pad
  • dremel out inlet to match malossi reed block
  • insert nipple for vacuum fuel pump
  • install crank.
  • install deepened head and test squish and clearances.
  • change over clutch corks (new ones soaking already).
  • Lap the surfaces of the malossi reed kit. (get lapping compound).

Sunday, September 17, 2006

THE GOOD NEWS OR THE BAD NEWS?

WE'LL START WITH THE BAD
I swapped out the motors yesterday for 2 reasons. One, to make sure the red rocket didn't end up in the back of the workshop in bits. secondly to give me the time to make any adjustments necessary prior to installing into the GL.
Today I stripped the engine and found...


1. the rotary pad is stuffed. The inlet porting was so extreme there is a matter of millimeters left, and that is scored badly.. because..
2. the crank was out of true. remembering the bashing that took place as we tried to get it in and the case halves together, as well as the transport from sydney I am not surprised.
3. I am going to have to go with a reed setup. There are many arguments for and against jb weld repair. I guess once I go reed I can't go back. One advantage should be improved fuel economy. I dream of getting the same economy as the rest of you.
4. The spending spree has a long way to go. I thought it was finished when I got the rims and tyres the other day.
5. the clutch showed no signs of damage after approx 2000km and the corks don't seem burnt much. I have been leaking oil from a few spots so the clutch has been under oiled for about 6-700kms.


ACTION REQUIRED
My mind is made up. I am installing a balanced long stroke crank, a custom head machined to not require a 1.5mm base gasket (the stroke is increased by 3mm stock). As far as I can tell, the use of a deepened head rather than a base gasket keeps the torque lower in the rev range and higher.
I am also installing a malossi reed block kit. I have no intention of racing around, nor trying for speeds of over 115kmh, so I have decided to go for a combination of fuel economy low end torque and, of course, the ability to surprise people with unexpected zip from a fat bastard on a little old vespa.
The rotary pad has been decimated by someone dremmelling out the inlet port (180 degrees I'm told) What remains of it has been scored by something (perhaps a result of the unbalanced crank).

So the shopping list has been made and now I go back to the body...

THE GOOD NEWS

Small details are each taking quite a bit of time. For example, getting the front brake cable to work on a PK drum at one end and a VNA handlebar at the other.
Missing spring for he cowl clip. Also the vna side panel doesn't quite clip on right.
I suppose the good news is that I was rummaging for a fuel tap lever I know I have somewhere when I stumbled across a cowl hook spring, a chrome bag hook (ordered for some reason in the past) a front brake cable that I was able to use, the missing washer for the fork top and some electrical connectors.

I have attached the fender and fork, now that I have the cables through.


Thursday, September 14, 2006

oily morning puddle's got me sumped

The fact that this morning's oil puddle was bigger and cleaner than usual just after I topped up the gear oil, may indicate that the leak is from a mid level part of the engine, such as..

1) the gear changer (hope so)
2) under the flywheel (there was a bit of oil under there last time I looked, but didn't look like it was coming from the actual seal.
3) clutch cover. (has threads stripped on one of the bolts. I last did it up with some gasket goo 2000 km's ago.
4) rear hub.

I wonder if it is possible to put talc on the motor (or something) to see where the source is. Once the scooter starts up the oil from leaks blows all over the place causing mass hysteria (well, difficulty tracing leak at least).

the screaming Jets

Getting ready to do some more jetting.
I haven't got the CH temperature above 230 while commuting, and it feels like the low end is getting richer. I will check whether the screws are working their way out (air and idle) or whether the air filter is getting clogged with 2t oil from the excessive blowback.
I have pretty much ignored the main jet for the last month as I have only been commuting, but I will ...
1) clean out the filter pod and see how the bike runs tomorrow.
2) count out the turns on the air and idle screws and check they are staying the same after a week.
3) put in a smaller main jet and see if there's a performance increase.
4) put the timing back to 18 BTDC and check with light.
5) change the needle to a leaner taper (3/8 throttle- WOT)

results...
1)
I cleaned out the foam air filter pod with soapy water and lightly oiled it with filter oil. I forgot I did this and when I started the scooter up this morning I thought I had a jammed throttle. It ran like a dream al the way to work (apart from the headlight falling out and hanging like a horror movie eyeball). I guess that cancels 2,4 and 5. I still need to sort out the main jet.

regulatory body

Here's where I put the regulator. I welded a strip of 25X3 flat steel to the battery tray and welded some bolts onto it for the reg to go onto. It may be a squeeze to ge the reg onto the bolts but we will see. If necessary I can slot the reg case on the left hole. I also welded a bit of flat bar sticking up to the left of where the reg goes for the attachment of the starter relay and any other bits and bobs.

Monday, September 11, 2006

I'm gonna walk down to .. 'ave a new electric


The puns are getting worse. Bad gags Loom-in.
So far I have the loom in place, have routed the cables through to the battery side, routed the tail-light cables and installed the tail-light (vietnamese GS copy). I think the tailight may have been a changeover one for a px because it sits flat and leaves a little gap at the top. I ground it which improved it a bit.
Electrics worries are as follows...
1) does my lighting/charging regulator work (got it in a box with some other stuff)?
2) Where to put the starter relay. The loom came with a cable that won't reach across the scooter from the battery side to the starter.
3) There is a cable missing from the loom - battery to regulator - no biggy.
4) Front headlight - the VNA headset is small and the replacement glass is plastic. I'd like to get a halogen in there, but am worried that even a normal 12V globe will melt the plastic.
5) Where to put a switch near the seat?
6) Do I put in a key ignition somewhere?

free range night - battery chicken no more

I was a bit chicken to deal with the battery, so tonight was a breakthrough. My battery tray arrived the other day from Lambretta Parts in America . I didn't check with anyone as to the best position for it in the glove box cowl, so I just took a punt.

...also I have managed to get the loom in, painted the cowls, front fender and headset with the colour matched paint and sent my new chrome rime (scootrs) to the scootermarket for some sava mc18 tyres.

..I have also attached some blingy bits also from scootrs. The cowl trim was fairly good, but the screws that came with the fender trim were made of cheese which didn't go together well with the badly tapped holes. Now I need to buy an easy-out and some decent m5 bolts. There's simply too much to do without having to mess around fixing dodgy bling. The shiny bits do help to detract from the lumpy bog-work.

Tanks for the Memories


got hold of a GS tank today. It holds 9 litres rather than the stock 7.5, meaning my range will be back up to 120 km rather than the 103 I am currently getting.
If I get around to installing a reed manifold maybe one day I will have a decent range.

Tuesday, August 22, 2006

Much to-do about nothing

the list of things to do during the motor changeover...
  • change clauss mounts back to stock
  • splitcases
  • change flyside bearing and seal
  • tap a hole for vacuum fuel pump
  • check clutch bearing
  • have crank trued

pump up the jam - but not the fuel

I have been asking around whether the vacuum pulse in the inlet manifold of a sidedraught carb (rotary induction) will suffice to run a small fuel pump...... no-one gave me a straigh answer so I thought I'd give it a go.

Update - I have just tapped a 1/4" line from the base of my inlet manifold (rotary pwk clone) and attached a fuel pump for testing.
I held one end in a bottle of fuel and the other over a bowl. The rise from the level on the bottle to the outlet was about 6" and I kept he hose lengths to a minimum. vacuum line length 8".
Nothing happened until I raised the bottle and removed air from the lines then....
At about 1/4 throttle it pumped fuel. Easily enough for 1/4 throttle riding.
AT 5000 rpm it was still pumping.
It slowed down at 6-7000
At flat stick it stopped pumping (8-9000rpm)

Currently I would call the project a failure, but I will do some more testing outside (I feel quite sick right now) and with the pump hooked up to the tank.

I am giving the motor a once over with the cases open when I put in in the project GL later this year, so I will tap the case then (remind me someone).

THe good thing is I achieved soemthing with the jetting.
Basically I oiled the air filted, restricting air and making it too rich. I then leaned out everything except the main jet.
132 main
JJH needle second position
38 idle
screw 2 turns out

I also rode aroud with a spare fuel bottle waiting to see at what stage the carb began starving for fuel. I was very please with getting 7 litres used up with no running out (I chickened out in the end) leaving only half a litre in the tank. Gold.

By the way I only got 100km from those 7 litres, but things might improve with a leaner mixture.

Wednesday, August 16, 2006

Fender Off With a Grinder


Well I lined up the fender as best as I could.
I had to sand the aluminium off the fork, bash out the fender a bit and drill new holes. All in all I think it looks straight.
I will compare my pics to some 'real' ones today and see if I have gone completely wrong.

Tuesday, August 15, 2006

Jetting all day, Jetting all night


After spending a couple of hours fiddling with the jets in the OKO 28mm carb, I cleaned up and wandered down to the forum to see the band 'Jet'.
My friend Steve plays keyboard in all of their shows (and on the record) , so needless to say there was some boozing to do. So busy was i at Jet that I forgot what jets I had put in earlier in the evening.
Fortunately when searching the internationalscooterbbs for jetting info, I found a post i had made before going out indicating the jetting changes I had made.
132 main
42 pilot
air screw 2.25 out
GKB needle (randall at Scootrs says it is an OEM needle, but I will have to research exactly what that means)


NOW! My worry is fuel starvation and I am deciding If How and When to install a vacuum fuel pump. These work by tapping into the pulsating crankcase pressure, normally involving drilling into the engine cases. Because of metal filings, this should always be done with the engine in bits. (a drag).
The online scooter community seems to be lacking in info as to whether the vacuum line can be taken from the inlet manifold instead of the cases (on a rotary valve motor). A go-kart guy gave me a definite NO, but some online say it is possible. I know it is cool in the reedblock on a reedvalve setup, so maybe people are getting them confused.
I will definitely tap the manifold and do some testing with fuel cans at different rev ranges. The pump is on order.


~ look at the brass fuel line nipple sticking up to the left of the pink hose. The base of that is at the same height relative to the fuel tank as a stock carb. If this can be swapped for an l-shaped fitting, the hose wouldn't have to rise up and down onto the nipple, creating the same fuel flow as for a stock setup. The pump setup allows for long range tanks, auxiliiary tanks etc, but at least if the flow can use all the main tank, I am not in danger of fuel starvation at 1/3 tank under load which could lead to leaning off and seizing.

Saturday, August 12, 2006

Making a meal of the High Carb- Hide-Rate

THIS POST IS ONE I WILL UPDATE AS MY JETTING CHANGES.
It starts when the carb is installed on the px200 (LML T5) and is currently on the GL PX 221 with Malossi reed block............ go to bottom for current setup


Ok, now I have installed the PWK Knockoff carby, and I am trying to jet it correctly.
The throttle cable went in easily enough. I already had a japanese style throttle cable anyhow (due to the shop not having a vespa one when mine broke). The choke adaptor was a bit dodgy but I got it done anyhoo.
It's the jetting that will be hard.
I started with the following:
130 main
stock (dunno) pilot jet
jjh needle in middle clip
Screw 2 out

At first I thought it ws all a bit lean as it was flat at 1/2 to 3/4 throttle.
I changed over to a 5th clip(richer) and a 136 main.
On the way home from doing that I felt that it was too rich -too lean-too rich
Tomorrow is plug chop day. I will be tearing up the freeway- a bit at a time.
First stop is needle back to middle notch, 132 main, 2 out.

They sent me 15 different main jets, two idle jets and two needles. I think the main jet will be the easiest to sort out... but... I have been studying up on the balance between all the needle elements and other jets, and have some info. Here's a collection of stuff taken from various locations...

It has been a while, but without banging on too much, I have experimented with a fair bit of jetting. After touring Tasmania 2-up I rebuilt the gearbox and since found the jetting to be boggy. I cleaned out the air-filte (foam pod) and changed the jetting from.
LJH 2nd clip

to.

JJK (leaner taper and leaner diameter) middle clip.

It runs great and for the first time has no bog down at 1/4 throttle.
The national rally (over 1000 km's ) is this weekend so I will keep a careful eye on the leanness (CHT guage) and be prepared to pop a richer taper or main jet in before leaving.

I have the following needles in order from rich to lean....
JJF (richer diameter 1/4) middle taper
LJH (middle diameter 1/4) rich taper1/4-3/4
JJH (middle diameter 1/4) middle taper
GJH (middle diameter1/4) Lean taper
JJK (lean diameter 1/4) middle taper - middle clip position - test1a
-2nd clip (leaner) test 2a(JL pipe)

test 1a - 15 km later the thing has great pickup through the rev range. A bit vibrationny at around 5500-75oo rpm. Still to hwy test to see what the main does. (haven't changed it but something seems to have richened everything... maybe the old flyside seal or the exhaust stub were leaking. In fact I know they were).

Now, things have changed again...
I have re-installed the infamous SIP performance (jl I believe) pipe.
It pretty much goes like a rocket without any carb changes which is good.
As these push the useable power higher in the rev range, I will have to now focus on getting the carb dialled in perfectly in the 0-1/3 throttle range. This is because the engine simply wants to get past the low revs as quickly as possible when taking off, and any delay can cause frustration.

Anyway....
TEST 2a - I have dropped the needle (raised the clip) to try and sharpen up the response in the 1/4 throttle area. The bogging/ loss of power in this position could well be due to a too lean clip position, so I am prepared to humbly go the other way later today .


Thursday, August 10, 2006

en-guard..... or... guard-on


My GS front guard arrived today. Hand made in Vietnam, it isn't too bad and should come up ok with some sanding and a skim coat. The big challenge will be shaping the PK fork aedn beating the fender to make it sit right. The PK fork was designed to fit a big squared off fender like a PX.

Partly finished event

Here's pics of the cowl repair...


FREE hit counter and Internet traffic statistics from freestats.com